Wednesday 30 December 2015

Quiet Book Page: Sensory Jellyfish

Let's do an easy-peasy four step quiet book page today. Enjoy!

1. Draw and cut out the shape of the body.


2. Hand stitch the eyes and the smile of the jellyfish. I use back-stitch for this.


3. Secure your choice of ribbons and laces as tentacles to the back of the body using a glue gun.


4. Sew the body onto the page.


A cute girly jellyfish all done!


Sunday 27 December 2015

Post-Christmas Blues?

Now that the Christmas holidays are coming to an end, I hope that my happy reindeer can cheer you up a bit if you are suffering from post-Christmas blues. Well, because Baby V's mummy is! Down with food poisoning for the past three days, I am basically stuck at home other than going to the doctor's. And so, missing all the Christmas fun. *sobs* Nevermind, let's look forward to the New Year holiday in a few days time. Cheers!


P.S. Photo by Baby V's daddy


Friday 18 December 2015

Quiet Book Page: Clown Fish Among Seaweeds

Hello again! This is a continuous of the previous tic-tac-toe page because I placed the extra starfish/ seashell on the seabed of this page. Let's start with creating the clown fish.

1. Draw and cut template. Cut two piece of orange felt as the body of the fish.


2. Randomly cut wavy strips of white felt and paste it on a piece of black felt. Cut the black felt along the white felt like this.


3. Paste it on the body of the fish and trim excess on the edges. Repeat another strip at the end of the body.


4. Add googly eyes and your clown fish is ready. Repeat to get two fish.


5. Cut a piece of light brown felt as the sand. Paste it on the bottom of the page. Do not glue the upper part of the seabed (arrow) just yet. Leave it for the insertion of ribbons as seaweeds later. 


6. Paste velcro for that extra piece of starfish/ seashell from the tic-tac-toe page.


7. Paste the clown fish using a glue gun.


8. Glue the bottom of some wavy ribbon and paste inside the light brown felt. Once done, sew along the seabed (arrow) for reinforcement.


9. Add more seaweeds to the seabed.


10. Cut a piece of purple felt and paste it on the seabed as coral.


11. Last but not least, cut some dark brown felt and paste it on the seabed as stones.


Yay! The extra seashell/ starfish from the tic-tac-toe page can now be placed on this page!


Tuesday 15 December 2015

Quiet Book Page: Tic-Tac-Toe

Today I'm going to share how I do my starfish and seashell tic-tac-toe page. Word of caution before I start: this page is very time consuming, you'll need plenty of patience to sew five starfish and five seashell for the game to work. If you are ready to take the challenge, read on!

1. Draw and cut templates. Ten pieces of starfish and ten piece of seashell is needed. Yes, that's right, a total of twenty cut outs! Don't go OMG just yet, it gets more tedious as you start sewing! *laughs*


2. This time around, I add stuffing so that tiny hands can hold them more easily. Stuffings were added as I blanket stitched around the front and the back of the starfish. It is not advisable to delay stuffing until you have almost complete sewing because the small size makes the process more difficult. Repeat until you get five starfish. Add googly eyes with a glue gun.


3. I used back stitch to create a swirl in front of the seashell.


4. Likewise, add stuffings as you blanket stitch the front and the back of the seashell. Repeat to get five seashell.


5. Voile! Five starfish and five seashell finally ready after N hours of stitching! Haha, just kidding, you don't actually need hours and hours of stitching. It gets easier when you get the hang of hand-stitching.


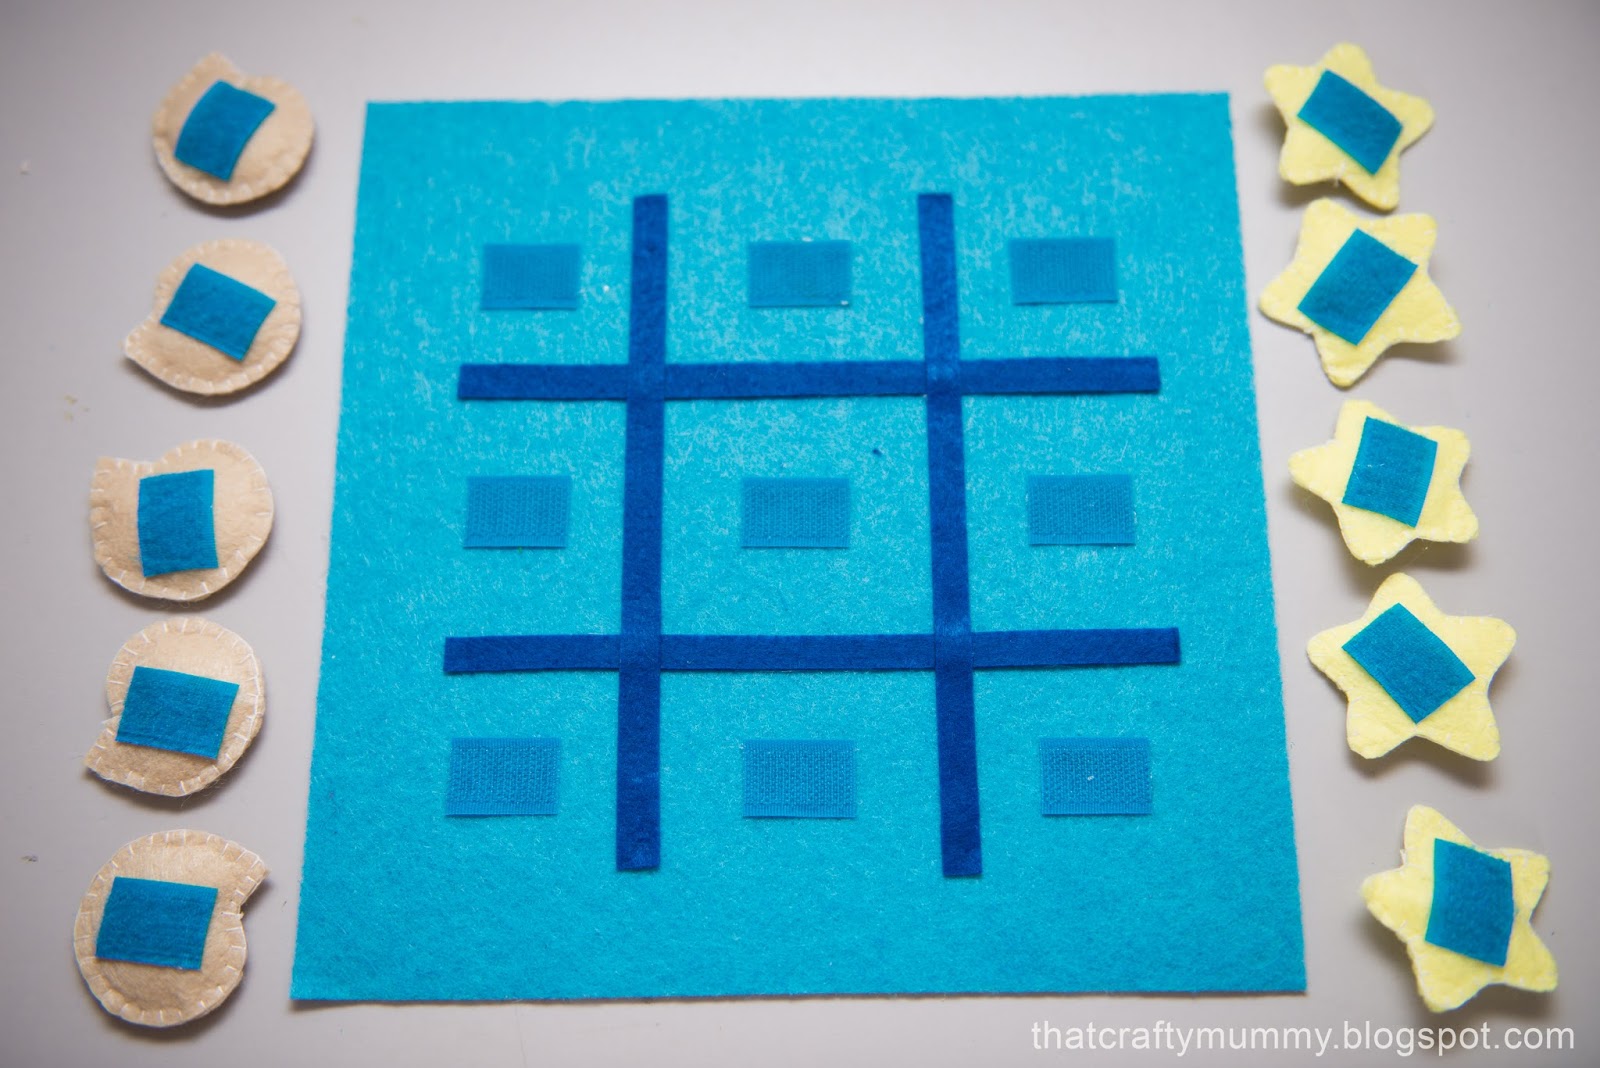
6. Cut four strips of 1cm wide felt. The length is up to you. My page is 25cm x 25cm and my strips are 19cm long.


7. Glue it onto the page.


8. Attach velcro to the starfishes, seashells, and the page using a glue gun.


Let's play tic-tac-toe! Now, you might wonder where to keep that extra one piece of starfish or seashell. Look out for my next post!


Saturday 12 December 2015

Baby Version Chawanmushi

OK, it's just steamed egg yolk custard actually, nothing fancy. Haha.

I started giving Baby V fruits and vegetable puree since she was 6 months old. She is not a big fan of purees and hardly takes porridge or oats (like a tablespoon every serving? Sobs). On good days, she'll munch away one or two broccoli "tree" and that's it.

So, I trial and error in search of food that she actually wants to eat. Once she hit 8 months old, I gave her egg yolk to see whether she likes it or not, and hence, the baby version chawanmushi. Surprisingly, she still loves her steamed egg yolk custard after her mummy serves it many times. Yeay! So I figure maybe this recipe is worth sharing and perhaps your little ones will love it too!

CAUTION: I used only the yolk for this recipe because my tiny human is only 8 months old. Egg white is one of the allergy triggering food which should be introduced much later. Please consult your doctor if you are concerned whether your baby should take any eggs at all.

Ingredients:
1 egg yolk
4 tablespoon water
1 teaspoon chopped carrot

Method:
Stir the ingredients together and steam for 5 minutes. I am a lazy mummy so I just put it on the surface of the rice when I cook for the family and the rice cooker will do the job. No need to wash extra pot for steaming. *grin* In fact, you can use this method to steam any tiny human food like veggies and fish fillets. Since the portion is small, the food is easily cooked from the steam of the cooking rice. 


OK, this is not the best looking chawanmushi but at least my tiny human approves of it. Haha. This is a very versatile recipe. You can replace carrot with any other ingredients of your choice, be it chopped green leafy veggies or minced chicken. Happy cooking! :D


Wednesday 9 December 2015

Quiet Book Page: Surfacing Whale

For this page, you'll need some grey, blue and light yellow felt, as well as a pair of googly eyes. Let's get started.

1. Draw and cut template.


2. Cut felt pieces using the templates.


3. Sew two sides of the whale together. You can secure it with a bit of glue beforehand to ease the sewing process.


4. Attach googly eyes on both sides with glue gun.


5. I used a light yellow 25cm x 25cm felt as my page. Glue three sides of the wave piece (arrow) to the page to create a pocket that can accommodate the whale. There is no need to sew the pocket now as it will be done when two quiet book pages are sewn together back-to-back.


Yay! The surfacing whale page is done!


Monday 7 December 2015

What's a Quiet Book?

A quiet book is a soft book filled with activities for tiny humans. I make my quiet books using felt and occasionally fabrics. Quiet book is not just for fun but also aids tiny humans in developing their sensory and motor skills. Activities such as matching, zipping, tying, and buttoning encourage them to explore more through play. While quiet book making is extremely time consuming, trust me, it's equally fun and addicting.

If you are keen to start your own quiet book, do pay a visit to your local craft and fabric store. Gather all the necessary materials and tools beforehand:
  • Felt. Look at my stash! *laughs* Don't worry, you don't need so many to start a book. Depending on the design, 20-30 piece of different colour felt should be more than enough for a 8-10 page book.
  • Fabric is optional but it really helps to add texture and variety to your quiet book. If you sew quite a bit, you will probably have some scraps. Do not throw these. Keep it for your quiet book.  
  • Sharp scissors.
  • Embellishments: ribbons, velcro, laces, buttons, googly eyes, strings, zippers, etc.
  • Hot glue gun is a must.
  • Threads and needle, or even better, a sewing machine. I hand-sew for tiny pieces but machine-sew for larger pieces as well as page finishings.
  • Eyelets and washers are optional. I use these as I prefer to add flexibility to my quiet book pages, be it changing pages or adding new pages later on. If you prefer to have a permanent book, you can stitch all the pages together. A 2-in-1 eyelet plier like this is super easy to use.
  • Rotary cutter and self-healing cutting mat are optional too. These tools offers a precise and accurate cut which saves a lot of time especially when you are cutting out pages.

With all these in hand, you are good start your own quiet book. Stay tuned for my "Under the Sea" quiet book!